Table of Contents
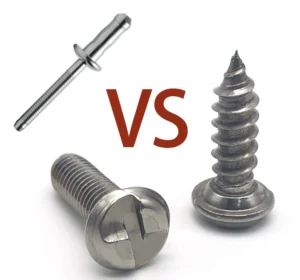
Countersunk head rivets are a very important type of blind rivets. Therefore it is very important to know how to install countersunk rivets. This guide will show me what to look for, common mistakes in installing countersunk head rivets.
Table of Contents
How to Install Countersunk Rivets?
Proper installation of countersunk head rivets can lead to unexpected results. And wrong installation may bring you financial loss. Here are the steps to install countersunk head rivets.
Step 1: Preparation of tools and materials
Before installing countersunk head rivets, you need tools and materials that meet the requirements of your project.
Tools:
- Rivet gun (electric or pneumatic)
- Electric drill (with appropriate bits)
- Chamfering bit (for countersunk hole preparation)
- File or sandpaper (optional, for finishing edges)
Material:
- Countersunk head blind rivets (choose diameter and length according to material thickness)
- Two or more layers of material to be joined (e.g. sheet metal, plastic sheet, etc.)
Safety gear:
- Goggles, gloves.
Step 2:Determine rivet size
- Rivet Diameter: Select the rivet diameter according to the material strength and application requirements (common specifications: 3mm, 4mm, 5mm, etc.).
- Rivet Length: The length of the rivet should be slightly greater than the total thickness of the material to be connected (formula: rivet length = total thickness of the material + the length of the head of the rivet reserved).
step 3: Drilling and chamfering
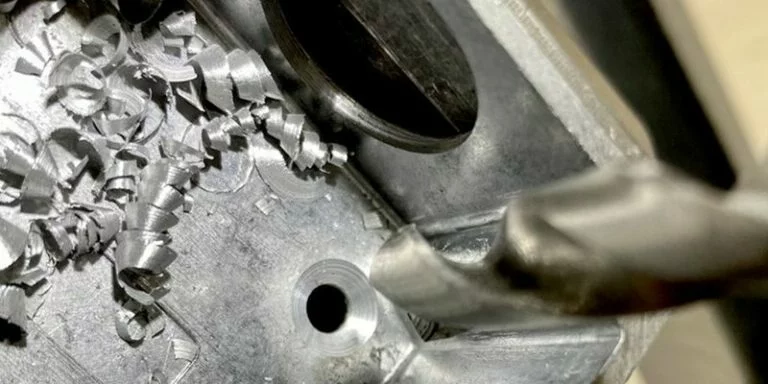
Drilling:
- Mark the drilling point at the location to be riveted.
- Drill the holes using an electric drill and a drill bit that matches the rivet diameter (e.g., a 4.1mm drill bit for a 4mm rivet).
- Ensure that the hole is perpendicular to the surface of the material and avoid tilting.
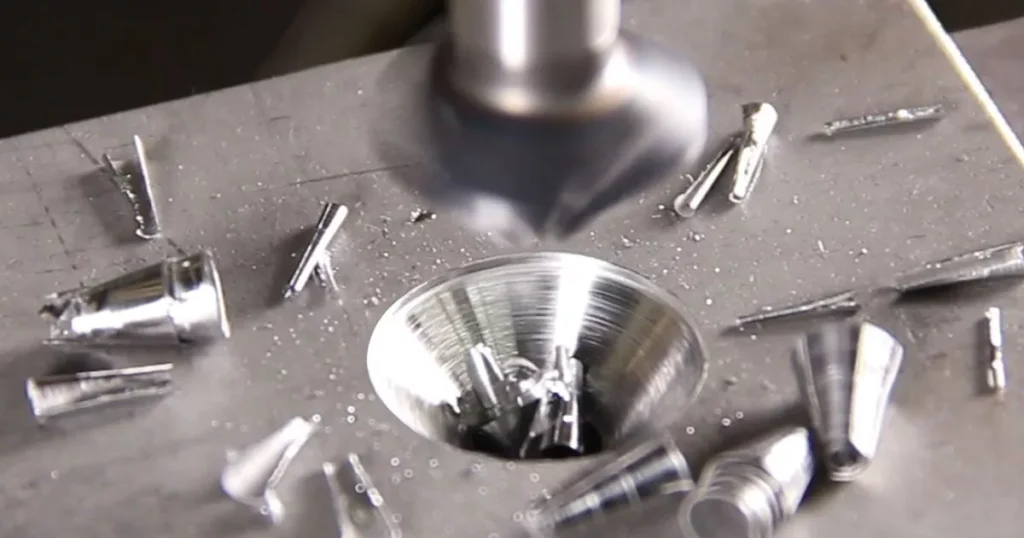
Chamfering:
- Use a chamfering bit to machine a 45° chamfer on the outside of the hole (the contact surface of the rivet head) so that the countersunk head rivet can be fully embedded in the surface of the material and remain flat.
step 4: Installation of countersunk head rivets
- Insert the rivet: align the head (flat end) of the countersunk head rivet with the chamfered hole and insert it into the hole, making sure that the rivet stem (mandrel) is exposed from the other side.
- Fixing the rivet gun: Set the collet of the rivet gun into the rivet mandrel (rod), make sure the rivet gun is perpendicular to the rivet.
- Pulling operation: Hold the rivet gun handle tightly and pull the mandrel at an even speed. At this time, the tail of the rivet will expand and clamp the material. When the mandrel is pulled off, stop the operation (manual rivet guns usually have a clear “click” sound or resistance suddenly reduced).
- Check the riveting result: Make sure the head of the rivet is fully countersunk in the chamfered hole and the surface is flat and free of bulges. Check whether the tail of the rivet to form a uniform expansion ring, to ensure a solid connection.
Do You Have Any Questions?
Let Us Solve Your Problem
Tips of Installing Countersunk Rivets
In addition to following the regular steps to install countersunk head rivets, there are some special notes that require special attention. The following are the points of attention for installing countersunk head rivets.
I. Material and rivet selection

Before the installation of countersunk head rivets, you need to pay attention to the choice of rivet material and size.
- Material matching: you need to choose the rivet material according to the nature of the material being connected.
- Rivet size: the rivet diameter needs to be slightly smaller than the diameter of the drill hole, and the length of the rivet should be greater than the total thickness of the material.
II. Drilling and chamfering
The holes for countersunk rivets need to be chamfered.
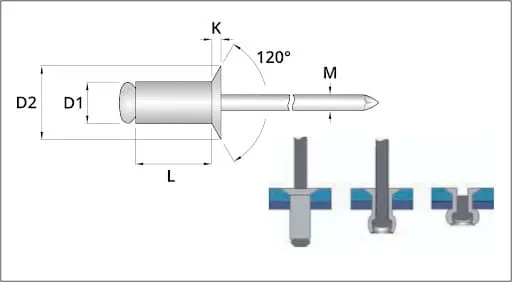
- The chamfer angle should be the same as the rivet head angle (usually 82° or 90°).
- The depth of the chamfer should be slightly greater than the height of the head of the rivet to ensure that the head of the rivet is fully embedded and flush with the surface (this can be checked with a depth gauge).
Example of a mistake: Insufficient chamfering can cause the head to bulge, and chamfering too deep can weaken the material.
Ⅲ. Rivet insertion direction
The flat end (head) of a countersunk head rivet must face the chamfered hole side with the mandrel (shank) coming through the back. Avoid tilting during insertion, as this may result in a skewed rivet or failed rivet pull.
Ⅳ. Rivet gun use

Ensure that the rivet gun chuck and the rivet mandrel are fully seated to avoid slippage. Keep the rivet gun perpendicular to the surface of the material when pulling the rivet to prevent incomplete breakage of the mandrel or deformation of the rivet. At the same time need to control the strength of riveting, excessive riveting will lead to deformation of the material or the head of the rivet depression; insufficient riveting will not be sufficient expansion of the rivet, the connection is not strong.
Do You Have Any Questions?
Let Us Solve Your Problem
Common Installation Errors with Countersunk Head Rivets
When installing countersunk head rivets, common mistakes often stem from negligence of operational details or improper use of tools. The following are 4 typical mistakes.
- Improper chamfering: The head of the rivet protrudes from the surface and cannot be fully embedded in the hole. When the chamfer angle or depth does not match the head of the rivet, resulting in uneven surface after riveting.
- Failure to clean up drilling debris: Rivet insertion is difficult, forced installation leads to scratches on the hole wall. Residual debris affects the expansion effect of the rivet.
- Neglect material compatibility: different metal contact leads to galvanic corrosion. The strength of rivets will be reduced under high temperature environment.
- Negligent material handling: thin plate material is deformed by riveting force. Misalignment of holes in multi-layer materials, resulting in stress concentration after riveting.
Summary: Practical tips to prevent mistakes
- Trial Verification: Test the rivet size, chamfer depth and rivet pulling strength on the waste material.
- Marking verification: Mark the length and material on the head of rivets with a marker pen to avoid confusion.
- Tool Maintenance: Clean the rivet gun chuck and lubricate the moving parts every month.
- Layering check: After every 5-10 rivets are completed, randomly select 1-2 to check the flatness and firmness.
By avoiding these mistakes, the installation quality of countersunk head rivets can be significantly improved, ensuring a connection that is both aesthetically pleasing and reliable.
Boost Your Business with High Quality Countersunk Rivets
Different qualities of countersunk head rivets bring different results. Poor quality rivets may only last a few months before they become problematic, which can lead to your customers becoming dissatisfied with you. Whereas rivets of outstanding quality will not have problems for years or even a decade, which will promote the success of your business.
Before placing an official order for countersunk head rivets, you can request for free samples of rivets for testing.
Get Rivets Quote
You may also find these topics interesting