


Common Rivet Installation Mistakes - How to Avoid When Using Rivet
Table of Contents
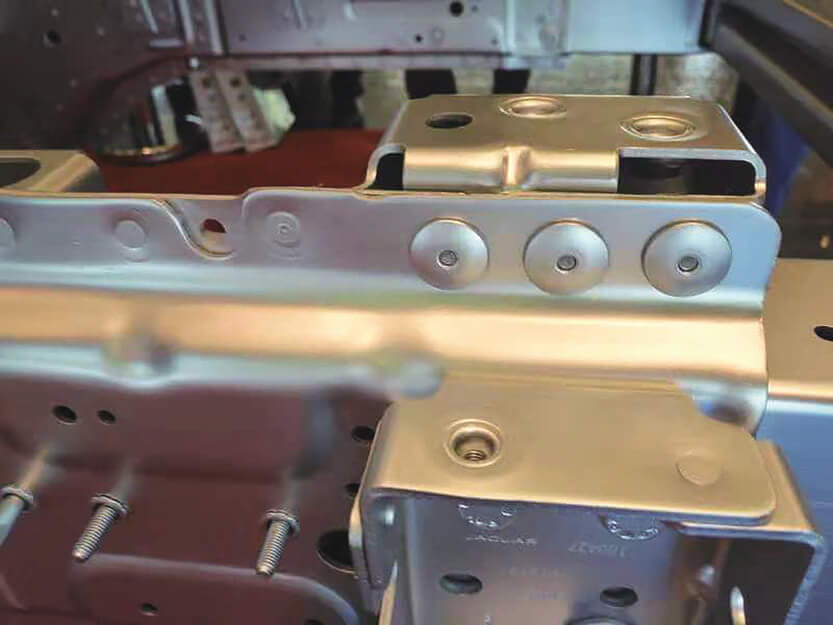
In industrial manufacturing and daily maintenance, rivet connections are efficient, reliable and do not require tapping. However, the seemingly simple riveting process often harbors risks. Errors in rivet installation are easily overlooked by operators. In reality, they may become the root cause of structural loosening, water seepage, rusting and even failure. To understand and avoid these issues, this article will systematically summarize the common mistakes to avoid when using rivets in practical applications. Combined with engineering cases, it will provide a series of professional and actionable prevention and correction suggestions to help technicians, purchasing engineers and production managers improve riveting quality and extend product service life.
The Basic Principles and Installation Process of Rivet Connections
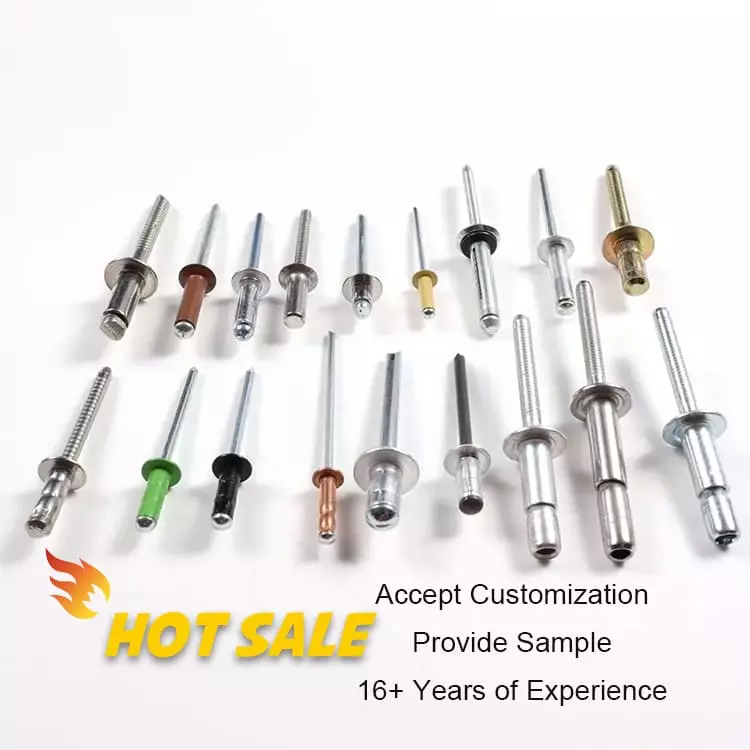
Bolt connection is a type of connection that achieves permanent mechanical fixation through plastic deformation. It is widely used in the structural assembly between metals, plastics, and composite materials. Depending on the structural requirements and the installation tools, the common types of bolts include the following:
- Solid Rivets: Have a long history and are suitable for high-strength structures, such as in aviation and bridges. Installation requires double-sided operation.
- Blind Rivets: Also known as blind rivets, they are suitable for single-sided contact conditions and are commonly used in sheet metal parts, appliance shells, etc.
- Structural Rivets: Based on the principles of blind rivets, they have enhanced shear strength and vibration resistance, and are often used in high-load scenarios such as vehicles and construction machinery.
- Drilling: Select the appropriate hole diameter based on the diameter of the rivet to ensure the hole wall is smooth and free of burrs.
- Inserting the Rivet: Insert the rivet into the hole of the workpiece, ensuring a tight fit.
- Breaking/Securing: Use a special tool to apply tension to the mandrel or lock the nail rod, causing the tail end to expand and form, completing the fixation.
- Installation Inspection: Confirm that the head of the rivet is tightly attached to the workpiece, and the tail end is fully deformed without cracks, ensuring the integrity of the structure.
The quality of rivet installation has a direct impact on the structural performance, which is mainly manifested as:
- Shear strength: If the rivets are not tightly attached or the hole diameters are too large, it can lead to uneven force distribution, thereby reducing the overall connection strength.
- Waterproofing: If the rivets are not compacted or the installation angles are incorrect, it can result in gaps, causing leakage problems.
- Fatigue life: An improper breaking process may introduce residual stress, affecting long-term stability and increasing the risk of fatigue failure.
Top 10 Common Errors in Rivet Installation and Analysis of Their Causes
Although rivets are small, they directly affect the overall stability and service life of the connection structure. Here are the most common mistakes to avoid when using rivets in actual engineering projects. Each one is worthy of attention and is accompanied by practical corrective suggestions.
①. Misalignment of aperture (too large/ too small)
When the aperture is too large: The rivets will shake within the holes, causing the connection to become loose, the shear force to decrease, and even falling off in a vibrating environment; When the aperture is too small: The rivets are difficult to insert, which may cause scratches or deformation on the surface of the rivets, further affecting the riveting strength and sealing effect. Solutions Proposed:
- Follow the reasonable ratio between the diameter of the rivet and the diameter of the hole. Generally, it is recommended that the hole diameter = rivet diameter + 0.1 to 0.2 mm;
- Refer to the rivet hole size chart provided by the manufacturer
- Refer to the drill bit size comparison table provided by the manufacturer and use dedicated drill bits to ensure accuracy.
②. Incorrect determination of clamping thickness
The grip range of the rivet is a key parameter that determines its performance. If the clamping range of the rivets is less than the total thickness of the sheet material, the rivet feet cannot fully expand, resulting in loosening or failure of the riveted connection.
On the contrary, if the clamping range is too large and the nail head shrinks excessively, it is also prone to deformation and bulging, which will affect the structural strength and appearance.
Therefore, accurately determining the total thickness of the workpiece and selecting the appropriate clamping range for the rivets is the fundamental requirement for avoiding the mistakes when using rivets.
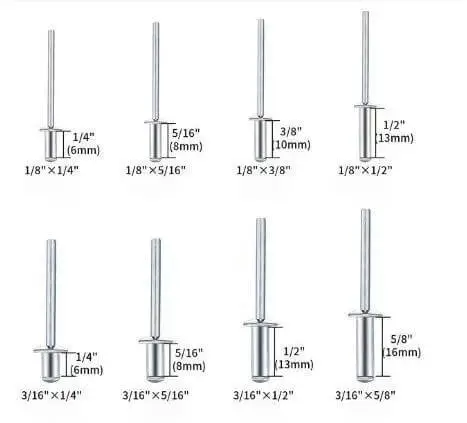
③. Incorrect selection of Rivet Length
The length of the rivet determines whether it can effectively cover the connecting material. Rivets that are too short cannot grip the sheet metal tightly and are prone to the “empty pull” phenomenon, resulting in an insecure connection. On the other hand, rivets that are too long are likely to bulge or deform at the nail head during the riveting process, thereby compromising the structural integrity.
The general principle for reasonably selecting the length of the rivets is: Grip Range = Total Thickness of the Plate ± Tolerance. This judgment criterion should be clearly defined before the design and construction.
④. Installation with Angle Deviation
When the rivets are not perpendicular to the connection plate surface, during the riveting process, the rivet tail will be skewed and spread out. This may lead to problems such as cracks and uneven internal stress in the structure.
When the rivets are not inserted vertically into the holes, resulting in an inclined installation, the axis of the rivets forms an angle with the plate surface, leading to uneven stress distribution. The expansion of the rivet feet is asymmetric, which is very likely to cause material cracking, surface warping or sealing failure. Especially in high-strength connections or structural riveting, such problems will seriously reduce the shear and tensile performance.
Avoid such mistakes when using rivets, and instead use positioning fixtures or alignment devices to assist in the installation, ensuring verticality.
⑤. Failure to remove burrs at the edge of the hole or surface contamination
Impurities such as burrs, oil stains, and iron filings at the hole edges can affect the bonding density of the rivets, leading to sealing failure and even initiating corrosion.
- Perform edge deburring treatment around the holes before riveting;
- Clean the riveting area to ensure a clean and flat surface.
⑥. Incorrect Tool Settings
If the pulling force setting of an air or electric pull-pin gun is not reasonable, it will directly affect the locking effect of the rivets.

If the clamping force is too small, the rivet will not be fully locked, resulting in a situation where it is partially pulled or loose. If the clamping force is too large, it may cause the pull pin to break, the rivet to be misaligned, or the sheet material to be damaged.
Different materials and specifications of rivets need to be matched with corresponding set values. The installation personnel should calibrate the equipment regularly.
⑦. Ignore Sealing Measures
When using nails or sealing gaskets in outdoor or humid environments, if they are not of the enclosed type, problems such as water seepage, rusting, and leakage are likely to occur. It is recommended:
- In sealed application scenarios, choose Closed-End Rivets (closed-type rivets);
- Use in conjunction with rubber gaskets or sealants to enhance the protection level.
⑧. Using low-quality or mismatched rivets
The material of the rivets should match that of the connecting components; otherwise, electrochemical corrosion is likely to occur. Especially when carbon steel rivets are used in aluminum plates, problems such as corrosion damage, darkening of color, and reduced strength often arise. Moreover, inferior rivets have poor processing accuracy and easily break the core rod, frequently causing structural expansion and deformation, or even fracture during use. To avoid such mistakes when using rivets, it is necessary to select regular brand products with quality certification. And the material should be chosen according to the working environment (such as stainless steel, aluminum, copper, etc.).
⑨. Rivets are not properly centered and aligned
If the installation position of the rivet is not accurately aligned with the hole: it will affect the uniformity of the rivet tail expansion, reduce the connection strength and affect the consistency of the appearance.
If the center of the rivet is not accurately aligned with the hole position: during installation, eccentric force will occur, reducing the shear bearing capacity and also affecting the flatness of the appearance.
Especially in decorative panels and precision components, the alignment deviation can lead to significant uneven stress, which may cause crack propagation or failure. This can be achieved through:
- Use laser drilling or CNC drilling equipment to ensure high-precision alignment;
- Conduct manual inspection to confirm that the hole positions are concentric.
⑩. Failure to conduct post-operation inspection
Failure to conduct the necessary tail extension inspection after riveting is the most easily overlooked yet high-risk operational error. If the core is not broken, the broken part is unstable, or the nail feet do not fully extend, the connection strength will be greatly reduced, and the connection may fail rapidly during use. It is recommended to conduct a post-riveting inspection after each batch of construction. This includes observing the tail condition, conducting random destructive tests, etc., which are the basic operational norms for controlling the reliability of riveting.
How to Avoid Installation Mistakes When Using Rivets?
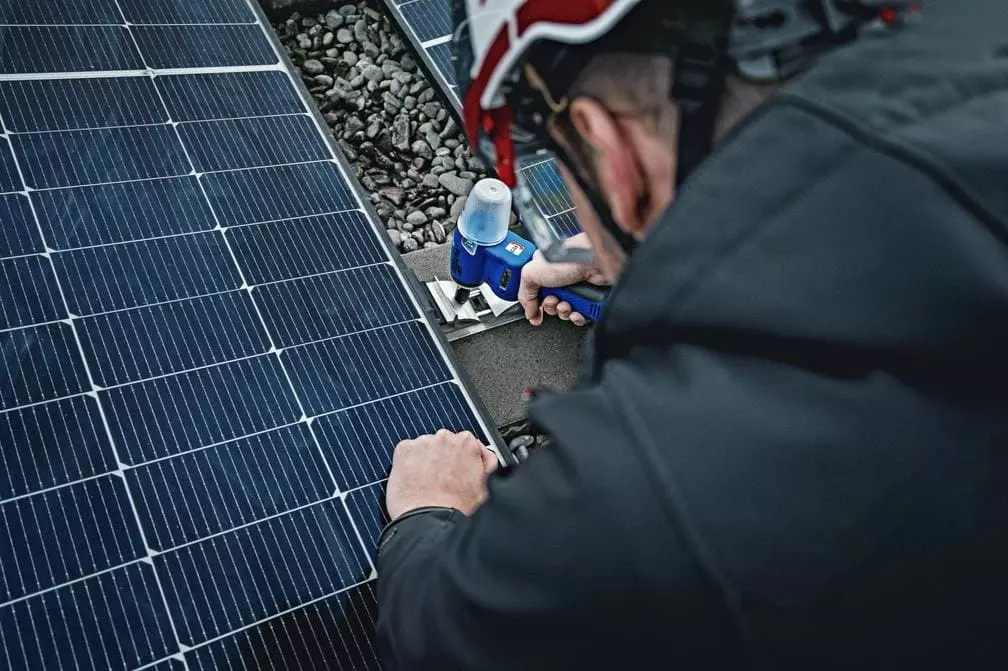
To ensure the firmness and durability of the rivet connection, it is crucial to master the correct rivet installation method. Below are the common types of problems and their corresponding preventive measures and recommended tools, which will help you complete the riveting work efficiently and avoid errors.
| Type of Mistake | Prevention Method | Recommended Tools/Assistive Devices |
|---|---|---|
| Incorrect Hole Size | Follow rivet specifications strictly to avoid oversized or undersized holes | Use depth-limiting drill bits, verify with calipers, refer to rivet size charts |
| Misaligned Installation Angle | Ensure the rivet is installed perpendicular to the work surface | Use vertical positioning jigs, assist with laser alignment or marking tools |
| Incorrect Rivet Length Selection | Choose the correct rivet based on total material thickness (Grip Range) | Use Grip Range calculators (e.g., Excel tools), consult manufacturer handbooks |
| Improper Tool Settings | Ensure the pull force is correctly set for the specific rivet | Calibrate regularly with a pull tester, use air pressure regulators for pneumatic tools |
| Material Incompatibility | Prevent galvanic corrosion by using compatible metal combinations | Refer to a galvanic corrosion chart to select metals with minimal potential difference |
How to confirm if it is installed correctly after installation?
To ensure that each rivet installation meets the quality standards, it is recommended to conduct the following checks and verifications:
Critical Checkpoints:
- Nail head symmetry: The nail head should be firmly in contact with the surface of the workpiece, without being tilted or deformed.
- Tail end expansion integrity: The tail end should fully expand, securely clamping the base material, without any detachment or loose connection.
- No cracks on the plate surface: The plates in the riveted area should have no obvious cracks, bulges, or stress marks.
Recommended Tools:
- Expansion Inspection Gauge: Quickly determine whether the tail end expansion meets the standard.
- Bolt Strength Pull Test Instrument: Conduct random inspections on key structures to verify if the tensile force meets the requirements.
Quality Traceability Suggestions:
Establish a standardized installation record sheet, including key information such as tool settings, inspection results, and operator signatures, and document each abnormal situation with pictures and text to form a complete feedback loop mechanism, which facilitates continuous optimization of the installation process.
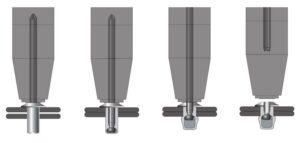
Examples of Common Error Scenarios
1. Installation with tilted angle vs. Correct vertical connection
Error manifestation: During the installation of the rivets, the gun head was tilted, resulting in eccentricity of the pull pin, and the expansion of the rivet tail was asymmetrical. This made it prone to instability in clamping and loosening of the rivets.
Correct Method: Ensure that the stud gun is kept perpendicular to the surface of the workpiece. Use positioning fixtures or laser-assisted positioning devices to help stabilize the direction and improve the consistency of the riveting.
2. Excessive hole diameter leads to failure of the rotating function of the core-pulling rivet
Error manifestation: The diameter of the hole exceeds the recommended range for the rivet, preventing the rivet from generating sufficient frictional force with the hole wall. During the installation process, “idling” occurs and the tail end deformation cannot be completed.
Prevention Suggestions:
- Use the limiting drill bit to control the hole diameter;
- Refer to the pop rivet hole size chart to strictly match the recommended hole size;
- For critical areas, you can increase the frequency of inspection with the inspection calipers.
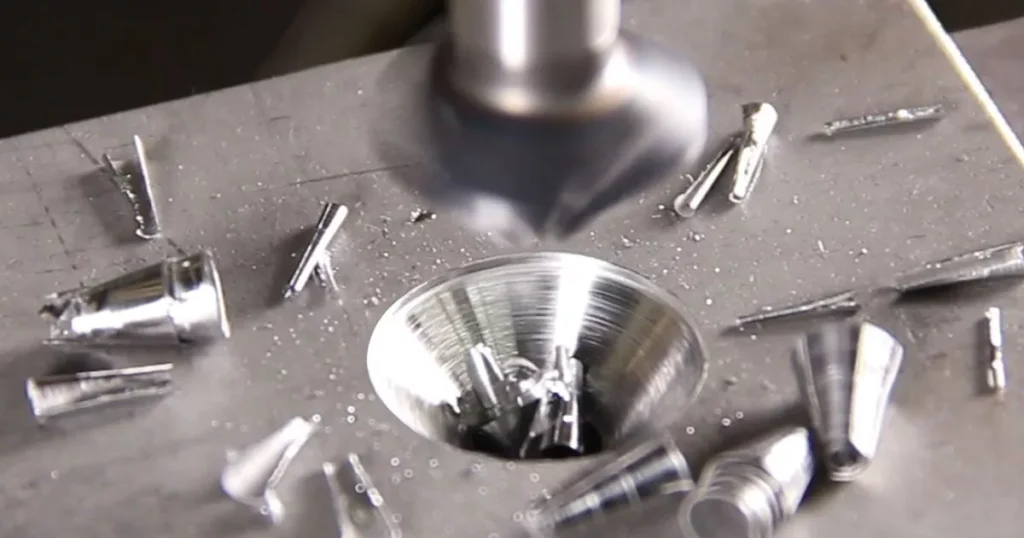
3. Comparison between Half-Expanded and Normal Expanded Tail States
Error manifestation: Some rivets failed to fully expand at the tail end due to insufficient tension setting, premature return of the gun head, or too short rivets (commonly referred to as “half-pulled”). The connection strength significantly decreased.
Identification Method
- Observe whether the tail shape is symmetrical and plump;
- Quickly screen suspicious areas using the “expansion inspection gauge”;
- For key structures, it is recommended to use the “pull-out tester” to verify the installation strength.
FAQs
What if the rivets cannot be pulled out?
The possible reasons are as follows:
- Incorrect selection of rivet diameter or length leads to excessive load on the core;
- Incompatible model of pull pin gun results in insufficient power or worn-out grippers, making it impossible to grip the core tightly;
- There are burrs or impurities inside the hole, causing the tail to fail to expand smoothly;
- The rivet material is too hard (such as stainless steel). It is recommended to use reinforced pneumatic or electric tools.
Solutions Proposed: First, confirm whether the rivet specifications match the firearm. Clean any foreign objects inside the holes. Then, check the wear condition of the clamping爪 of the pull pin gun or replace it with a tool that has greater pulling force.
The core puller broke but didn't grip tightly? Can it be remedied?
This situation is usually referred to as “cracking of the core but no formation”. The following are the handling methods:
- Minor deformation: You can try using a special core extraction tool to remove the broken core, and then re-bolt it;
- The bolt is stuck: It is recommended to remove the entire bolt (using a special bolt removal drill), and then reinstall it;
- If using stainless steel bolts, it is recommended to avoid forcibly extracting to prevent damage to the base material.
Prevention Tips: Check the condition of the gun clamping mechanism to ensure stable force output; if the pull pin is rusty or has burrs, it will also increase the risk of breakage.
How to determine if the rivet clamping force meets the standard?
To determine whether the clamping force meets the standards, one can start from the following aspects:
- Tail appearance inspection: The qualified rivet tail should be symmetrically and fully expanded, without any skew or creasing;
- Manual inspection: Gently twist the riveted part, and there should be no looseness;
- Torque test or pull test: For critical structures, it is recommended to use professional testing instruments to confirm the connection strength;
- Destructive sampling inspection: Sample the already riveted part for dissection, and observe whether the tail end deformation completely clamps the sheet metal.
Why do aluminium rivets start to rust after only a few months?
Aluminum itself does not rust. However, if corrosion occurs, the reasons usually include:
- The environment contains salts, acids, bases or industrial pollutants, which accelerate the corrosion of aluminum materials;
- It is combined with carbon steel core wires, causing electrochemical corrosion (contact between different metals);
- The surface is not anodized, making the aluminum material more prone to corrosion when exposed to harsh environments;
- Water accumulates in the structure, accelerating oxidation.
Suggested Usage:
- For outdoor or humid environments, it is recommended to use all-aluminum or stainless steel rivets;
- Avoid mixed structures of aluminum and steel;
- Or choose industrial-grade rivet products with anti-corrosion coating.
Conclusion: How to Avoid Installation Errors When Using Rivet
Although the installation process of rivets may seem simple on the surface, it actually directly affects the strength of the structural connection, the anti-corrosion ability, the sealing performance, and the overall service life. A seemingly minor installation error can often lead to serious structural problems in the later stage.
Therefore, it is recommended that enterprises conduct regular professional training for installation personnel, establish detailed installation operation guidelines and operating procedures, and provide corresponding measuring tools and equipment (such as tension gauges, expansion inspection gauges, etc.) for random inspection and verification.
Reference

How to Rivet Metal to Wood?
How to Rivet Metal to Woo
What Is Riveting in Metal Work?
What Is Riveting in Metal

What Metal Are Rivets Made Of
What Metal Are Rivets Mad
How to Rivet Metal to Metal
How to Rivet Metal to Met