The quality of rivet nut installation affects the stability and performance of the entire connection. Therefore, when installing rivet nuts, you need to select the appropriate rivet nuts, use a suitable rivet gun, and follow the correct procedure for riveting. After installation, inspect the results to ensure that the internal threaded connection at the joint is secure and stable.
Below, I will walk you through the process in detail, covering pre-installation preparations, installation procedures, and post-installation inspections. The goal is to prevent the rivet nut from loosening or rotating after installation.
Table of Contents
Tools and Materials You Need Before Installation
Before installing a rivet nut, you need to prepare the appropriate rivet nut, installation tool, drilling tool, and measuring tools. It is crucial that the installation tool matches the specifications of the rivet nut and the material being installed. Otherwise, the rivet nut will not form a secure connection after installation.
Rivet Nuts
Manual rivet nut tool, electric or pneumatic rivet nut tool.
Electric drill and drill bitsVernier caliper
Safety goggles, clamps to secure the workpiece, and necessary test panels.

How to Choose the Correct Rivet Nut and Grip Range

Selecting the Clamping Range of Rivet Nuts Based on Sheet Metal Thickness
First, use a vernier caliper to measure the actual thickness of the sheet metal at the installation location. Calculate the total thickness of all the sheets to be joined. Next, consult the product specification sheet provided by the supplier to determine the clamping range of the rivet nuts, and select a size whose total thickness falls within that range.
If the sheet metal is too thin, the rivet nut may deform excessively. If the sheet metal is too thick, the rivet nut may not deform sufficiently to securely clamp the material.
Selecting the Appropriate Thread Size and Rivet Nut Design
The thread size should be selected based on the specifications of the matching bolt, the load-bearing capacity required for the joint, and the available installation space. When selecting the rivet nut design, use a cylindrical rivet nut for joining standard thin metal sheets. If high anti-rotation performance is required, it is recommended to choose a knurled or hexagonal design.
Selecting the Material for Rivet Nuts

Common materials include stainless steel, iron, and aluminum. The choice of material should be based on the specific operating environment and requirements. Stainless steel is suitable for environments requiring corrosion resistance. Steel is suitable for general-purpose connections. Aluminum is suitable for lightweight connections.
Step 1: Mark and Drill the Correct Hole Size
Use a marker or a scriber to mark the drill hole centers on the connected panels. Next, select the appropriate drill bit size based on the hole size specified by the rivet nut manufacturer. When drilling, secure the panels and keep the drill bit perpendicular to the panel surface to minimize hole misalignment or enlargement. After drilling, check whether the actual hole diameter meets the manufacturer’s specified dimensions and tolerances.
Please note that the thread size of a rivet nut is not the same as the mounting hole diameter. The thread size only specifies the size of bolt to use. For example, M6 indicates that the nominal diameter of the internal thread is 6 mm; it does not mean you need to drill a 6 mm hole. To determine the correct hole size, consult the product specifications for the rivet nut you purchased to find the recommended mounting hole diameter.
Step 2: Deburr, Clean, and Inspect the Hole
You need to use a deburring tool to remove any protrusions or sharp edges created during drilling. Be careful not to enlarge the mounting holes. Then, use a brush or a clean cloth to remove metal shavings, dust, and oil from inside and around the holes to ensure they are free of debris. Finally, check that the diameter of the mounting holes meets the manufacturer’s specified dimensions and tolerances, and that the hole edges are free of visible burrs, cracks, or deformation.
You need to understand that the purpose of deburring is to ensure that the head of the rivet nut seats properly against the sheet metal. Avoid making the mounting hole progressively larger.
Step 3: Set Up the Rivet Nut Tool and Mandrel
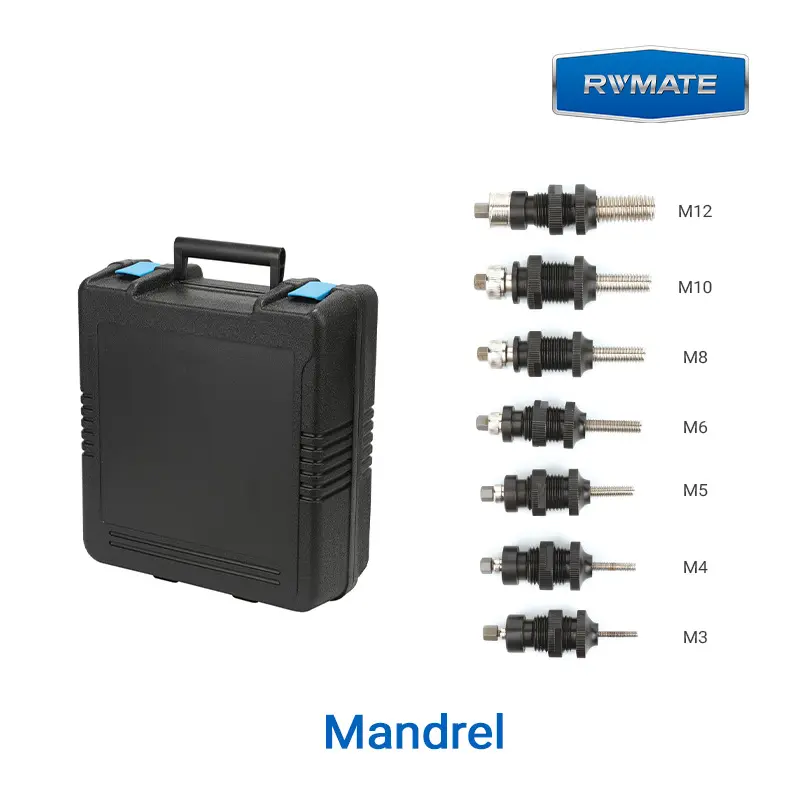
First, you need to verify that the thread size and pitch of the mandrel match those of the rivet nut, and that the rivet nut head fits properly against the tool tip. If the mandrel and tool tip are not compatible, this can result in installation failure or damage to the internal threads. Next, set the correct stroke and pulling force based on the rivet nut’s specifications, material, and sheet metal thickness.
Step 4: Insert and Set the Rivet Nut
First, screw the rivet nut onto the tie rod, ensuring that the head of the rivet nut is flush with the gun nozzle and that the threads are properly engaged. Next, fully insert the rivet nut into the mounting hole until its head lies flush with the sheet metal. Then, hold the installation tool as perpendicular to the sheet metal as possible. Activate the rivet gun to perform the riveting. The rivet nut undergoes plastic deformation on the back of the sheet metal, forming a bulge that clamps the sheet metal in place.
Step 5: Remove the Tool and Inspect the Installed Nut
After completing the riveting, unscrew the pull rod. With manual tools, this is done by rotating the pull rod in the opposite direction; pneumatic or electric tools feature an automatic retraction function. Next, inspect the quality of the rivet nut after installation. Inspect the appearance of the head and the deformation at the tail end, and check for looseness or free play by pulling on the rivet nut. Finally, perform a test using a bolt that matches the rivet nut’s thread size and pitch. Verify that it screws in and out smoothly.
How to Verify Clamp, Alignment, and Thread Quality
Once the rivet nut is installed, you may wonder how to verify the clamping effectiveness, concentricity, and thread quality. Checking the clamping effectiveness clamp, alignment , and thread quality can effectively identify issues such as loose installation, misalignment, or thread damage.
1. Check the Clamp
Pay close attention to whether the head of the rivet nut is in tight contact with the sheet metal. Check for any noticeable gaps or looseness around the perimeter. You can apply reasonable force to check whether the rivet nut wobbles or rotates. If you can access the back of the sheet metal, observe whether the tail end is sufficiently deformed and securely clamping the sheet metal. If the rivet nut shows noticeable looseness or free rotation, there may be an installation issue, and you should check the clamping range, mounting hole diameter, or tool settings.
2. Check Alignment
Check whether the rivet nut is installed straight. For standard flat-head rivet nuts, the head must lie flush with the sheet metal surface. If noticeable lifting or tilting is observed, verify that the thread axis aligns with the intended bolt installation direction.
3. Check the Thread Quality
Select a bolt that matches the rivet nut’s specifications and pitch for a preliminary inspection. Under normal conditions, the bolt should screw in smoothly by hand without the need for excessive force. Abnormal conditions include sticking, inability to screw in, or obvious thread damage. If this occurs, you should immediately stop the operation and investigate the specific cause. For products with strict dimensional requirements, you can also use a GO/NO-GO thread gauge to verify that the internal threads meet the specified requirements.
Common Installation Mistakes and How to Fix Them
| Common Installation Problems | Possible Causes | Recommended Solutions |
|---|---|---|
| Rivet Nut Spinning | Oversized installation hole, insufficient setting force, or inadequate resistance to rotation. | Check the hole diameter and tool settings. If the installed rivet nut spins, assess whether it needs to be removed and replaced. For higher torque requirements, consider a suitable hexagonal or knurled rivet nut. |
| Loose Rivet Nut | Material thickness outside the specified grip range, or insufficient setting force or stroke. | Measure the actual material thickness, verify the grip range, and check the tool settings. Evaluate loose rivet nuts for replacement rather than simply increasing the setting force. |
| Over-Setting | Excessive setting force or stroke, or an incorrect rivet nut specification for the material thickness. | Adjust the installation tool according to the manufacturer’s instructions. Remove and replace rivet nuts showing cracks, severe deformation, or damaged threads. |
| Misalignment | The installation tool is not perpendicular to the material, burrs remain around the hole, or the rivet nut is not fully inserted. | Remove burrs, ensure the rivet nut flange sits properly against the material, and keep the tool perpendicular during installation. Evaluate incorrectly installed rivet nuts for replacement. |
| Thread Damage | Incorrect mandrel size, excessive setting force, or a bolt inserted at an angle. | Check the mandrel size and condition, and correct the tool settings. Replace rivet nuts with damaged internal threads. Never force a bolt into damaged threads. |
| Poor Flange Seating | Burrs around the installation hole, an uneven material surface, or incorrect rivet nut positioning. | Clean and deburr the hole, inspect the mounting surface, and ensure the rivet nut flange is properly seated before setting. |
| Mandrel Stuck | Damaged mandrel or internal threads, excessive setting, or a malfunctioning mandrel reverse mechanism. | Stop applying force. Check the mandrel and reverse mechanism according to the tool manufacturer’s instructions. Replace damaged components or remove the defective rivet nut if necessary. |
| Rivet Nut Pull-Out | Oversized installation hole, insufficient clamping, or tensile loads exceeding the joint’s capacity. | Verify the hole diameter, installation quality, and specified pull-out performance. Select a suitable rivet nut and validate the joint’s load capacity where required. |
| Sheet Material Tear-Out / Pull-Through | Thin or weak sheet material, inadequate local material strength, or insufficient load distribution. | Check the material thickness and strength. Consider a rivet nut design suitable for thin sheets or reinforce the joint area where appropriate. Validate the revised connection design. |
Installation Adjustments for Metal, Plastic, and Composites
Metals, plastics, and composite materials have different load-bearing capacities. Therefore, different installation methods must be used when installing rivet nuts on metals, plastics, and composite materials. The rivet nut design, the method of machining the installation holes, and the riveting stroke or force of the tool should be adjusted according to the characteristics of the material. This helps prevent plastic and certain composite materials from breaking due to excessive compression.
Metal Materials
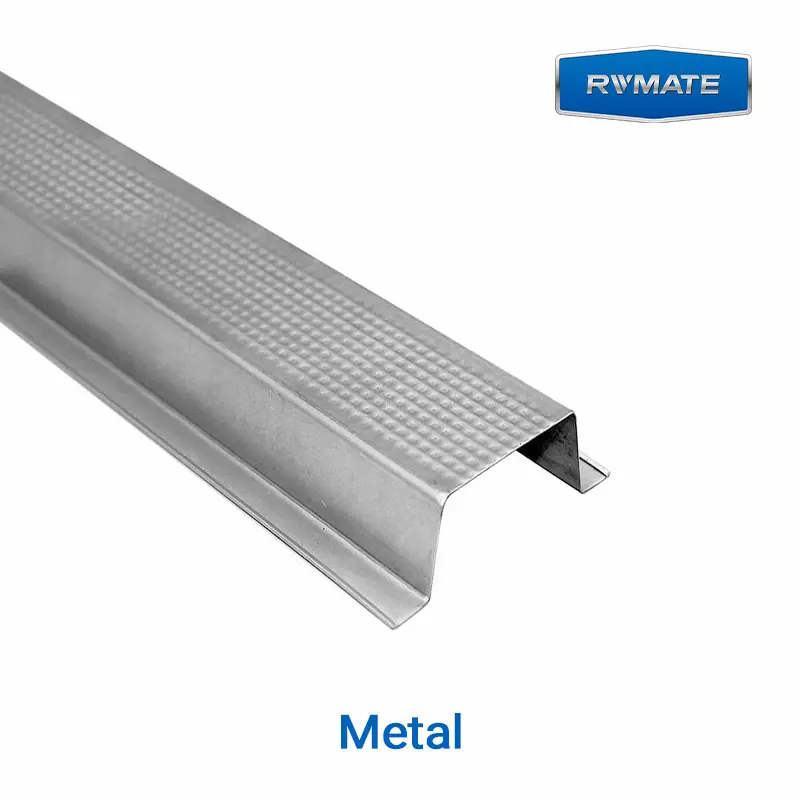
Common metal materials include steel sheets, aluminum sheets, and stainless steel sheets. Select standard rivet nuts that meet the requirements for sheet thickness and fastening. Before installation, verify the mounting hole diameter and clamping range according to the product’s technical specifications.
When working with softer metal materials such as aluminum sheets, special attention must be paid to the risk of mounting hole deformation and the rivet nut slipping. When installing thinner metal sheets, adjust the riveting stroke or pulling force to avoid localized deformation of the sheet caused by excessive riveting force.
Plastic Materials

Plastic is more prone to localized indentations or deformation than metal. Some brittle plastics may even crack due to the forces generated during riveting. Therefore, you cannot directly apply the rivet nut installation settings used for metal sheets.
When installing on plastic sheets, prioritize the use of large-flange rivet nuts or slotted-body rivet nuts. A large flange effectively increases the contact area of the head. The slotted expansion structure creates a larger support area on the back of the sheet, helping to distribute localized loads.
During installation, you must control the riveting stroke or pulling force based on the pressure the plastic can withstand. For plastics that are thin, brittle, or unable to withstand installation pressure, it is recommended to use fasteners specifically designed for plastics.
Composites
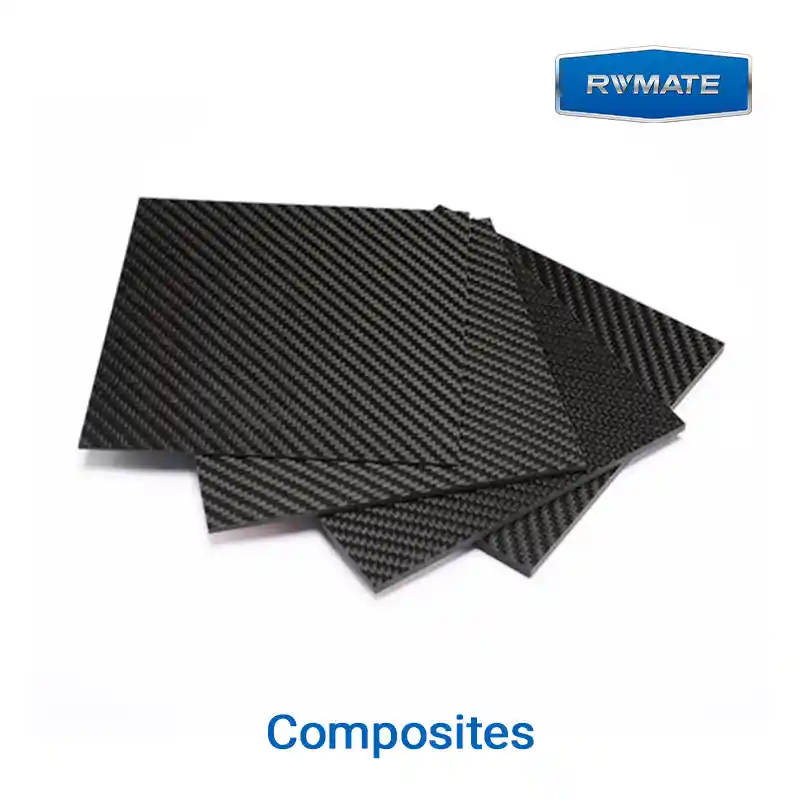
Excessive compressive stress between the fiber reinforcement layer and the resin layer within some composite materials can easily cause delamination. When drilling, use machining tools and processes suitable for composite materials to reduce the risk of fiber tearing, burrs, and delamination at the hole opening. Inspect the hole walls and opening for any visible damage.
When selecting a rivet nut type, prioritize specialized rivet nut designs with a larger backing surface area that can distribute the clamping load. For example, the Slotted Body Rivet Nut. During the riveting process, strictly control the degree of deformation in accordance with the manufacturer’s specifications to avoid material cracking or delamination caused by excessive localized pressure.
When the composite structure is thin, has a honeycomb or foam core, or involves heavy-duty connections, you must verify the effectiveness and performance through actual riveting tests. Do not simply select standard rivet nuts.
FAQs
What size hole should I drill for a rivet nut?
The size of the hole to be drilled for a rivet nut depends on the specific model, external structure, and manufacturer’s specifications of the rivet nut. You should first check the “Recommended Hole Size” in the product data sheet and drill the hole according to the specified dimensions and tolerances.
Can I install a rivet nut without a dedicated tool?
No. Failure to use the correct tools can result in insufficient deformation of the rivet nut, damage to the internal threads, deformation of the sheet metal, and the rivet nut spinning.
How do I keep a rivet nut from spinning?
The key factors in preventing rivet nuts from spinning are hole size, clamping range, and rivet nut type. Ensuring that the size of the mounting hole matches the clamping range of the rivet nut can effectively reduce spinning. Second, select the correct type of rivet nut. For applications requiring high anti-rotation performance, choose a knurled rivet nut or a hex rivet nut, which can effectively enhance mechanical interlock.
How much setting force should I use?
There is no fixed standard for the riveting force that should be applied when installing a rivet nut. The appropriate force depends on the rivet nut’s size, material, design, clamping range, and the thickness and material of the sheets being joined. The correct approach is to consult the technical specifications provided by the rivet nut manufacturer to complete the installation.
Why does a rivet nut pull in crooked?
Riveted nuts may become misaligned after riveting; the key factor is that the riveting tool is not perpendicular to the sheet metal surface during installation. Other possible causes include improperly machined mounting holes, burrs at the hole edges, and the rivet nut not being fully inserted and seated against the sheet metal.
Do rivet nuts need threadlocker after installation?
It is not always necessary to use threadlocker after installing a rivet nut. It depends on whether the connection is prone to loosening due to vibration. Threadlocker is applied between the bolt and the internal thread to prevent the threaded connection from loosening. It is important to note that threadlocker cannot resolve the issue of a rivet nut that is not securely installed.
Can an installed rivet nut be removed and reused?
They can be removed but cannot be reused. This is because the tail end of the rivet nut undergoes permanent plastic deformation during installation, and removal would damage the rivet nut itself.
What bolt torque can an installed rivet nut handle?
The maximum bolt tightening torque that an installed rivet nut can withstand depends on the thread size, material, design, installation quality, and the strength and thickness of the sheet metal. There is no standard fixed value. You should install the rivet nut in accordance with the recommended assembly torque and torque performance data provided by the manufacturer.
Work with a IATF 16949 Certified Blind Rivet Manufacturer
Get High Quality Rivets Instead of Huck and Avdel Rivets

Rivmate Rivet
Rivmate is blind rivets manufacturers in china. The company is IATF 16949 certified and offers high-strength structural blind rivets that serve as alternatives to Huck and Avdel products.
Explore Rivmate Cases
Rivmate Rivet
Rivmate is blind rivets manufacturers in china. The company is IATF 16949 certified and offers high-strength structural blind rivets that serve as alternatives to Huck and Avdel products.

Hey There, I'm Allen!
I am the boss of Rivmate. For over two decades, we have specialized in the manufacture of blind rivets, providing our customers with reliable riveting solutions. Need riveting services? Feel free to contact us.