A rivet nut tool is a specialized tool used to install rivet nuts. By using a rivet nut tool, a reliable internal threaded connection can be formed on one side of thin sheet metal, tubing, or other suitable materials.
The rivet nut tool works by generating tensile force through the mandrel when the tool is activated. This causes the base of the rivet nut to deform and contract inward, thereby forming a locking structure on the back side of the sheet metal.
Table of Contents
What a Rivet Nut Tool Does
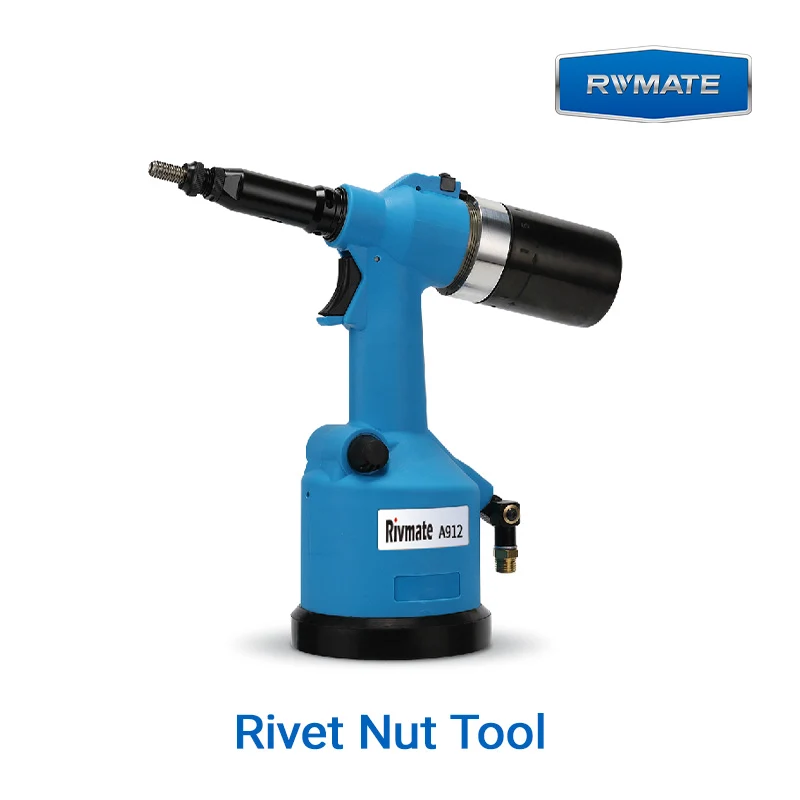
The primary function of a rivet nut tool is to securely install rivet nuts onto workpieces, providing a reliable internal threaded connection for subsequent use with bolts or screws. Compared to standard rivet nuts, rivet nuts can be installed from one side of the workpiece, making them particularly suitable for connections where the back side is inaccessible. They are widely used in automotive parts, sheet metal enclosures, mechanical equipment, metal cabinets, and industrial assembly.
Before using the rivet nut tool, a suitable mounting hole must be machined into the sheet metal. Next, the rivet nut is mounted onto the tool’s mandrel. Insert the rivet nut fully into the hole. Activate the tool to pull the mandrel, causing the tail end of the rivet nut to undergo plastic deformation. The deformed portion, together with the nut head, clamps the workpiece, securing the nut in the hole. The rivet nut is now installed. The internal threads of the rivet nut can be used to install bolts or screws of a matching size.
The Rivet Nut Tool is designed solely for installing rivet nuts; it is not intended for drilling holes or cutting internal threads. When machining the mounting holes, be sure to check the recommended range in the technical specifications provided by the supplier. Avoid installing the rivet nut loosely due to an oversized hole.
How the Mandrel and Setting Mechanism Work
The two most critical components in the installation process of a rivet nut tool are the mandrel and the setting mechanism. The mandrel and the setting mechanism must work together to secure the rivet nut to the material without needing to contact the back of the workpiece.
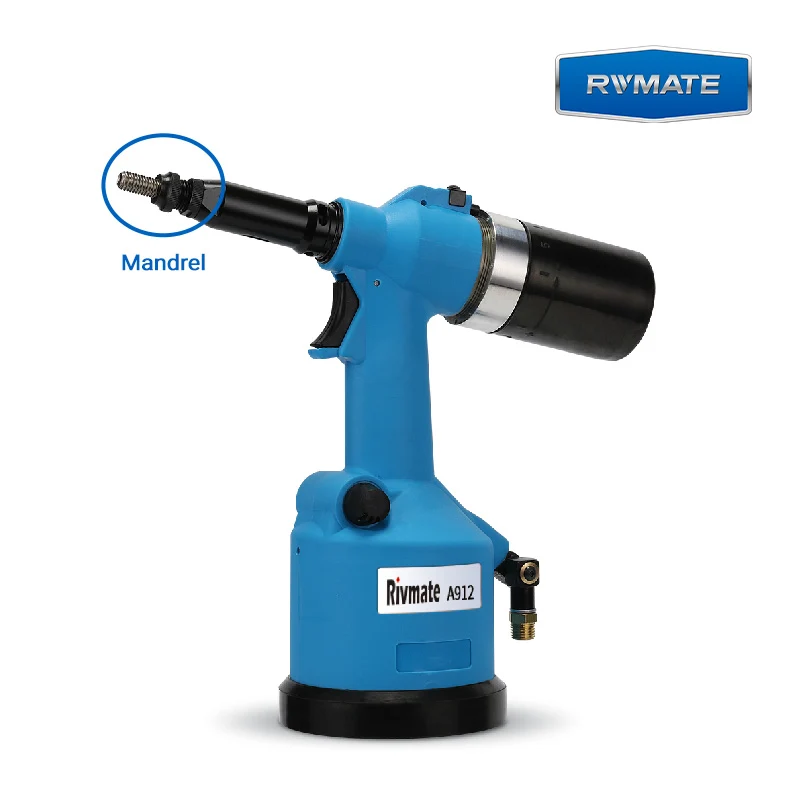
- The primary function of the mandrel is to connect the rivet nut and transmit tensile force. Before starting the tool, select a mandrel that matches the thread specifications of the rivet nut. Once the mandrel is screwed into the nut, pulling on the mandrel causes the nut to deform.
- The primary function of the setting mechanism is to generate axial tensile force, causing the rivet nut to undergo controlled deformation. Axial tensile force refers to the tensile force applied along the length of the mandrel. When you activate an electric or pneumatic tool, the mechanical transmission or power mechanism inside the tool pulls on the central mandrel. At the same time, the head of the rivet nut is held against the support surface at the tool head. Therefore, as the mandrel is pulled backward, the tool head provides corresponding support force, and the two interact. This causes the tail end of the rivet nut to bulge or fold against the back of the workpiece.
When the rivet nut is sufficiently deformed, the deformed areas on its head and back work together to clamp the workpiece, thereby securing the sheet metal. Finally, the tool releases the tensile force and disengages from the installed nut by retracting the mandrel or through a corresponding disengagement mechanism.
The video above shows the Rivmate technical team demonstrating how to use a rivet nut gun in the lab. You can see the actual installation process firsthand, which will help you better understand how the rivet nut tool works.
Manual, Lever, Pneumatic, Hydraulic, and Cordless Tool Types
There are many tools available for installing rivet nuts, and the main differences lie in the method of applying force, the magnitude of the force, installation speed, and the appropriate application scenarios. Manual tools are used for installing small numbers of rivet nuts. It is very important to choose the right rivet nut tool. For example, for continuous installation of hundreds or thousands of rivet nuts on a production line, pneumatic, hydraulic, or cordless tools are the preferred choice.
Manual Rivet Nut Tools
Manual rivet nut tools generate the tension required for installation by gripping or operating the handle. The advantage is that they do not rely on a power source, compressed air, or a separate hydraulic power source. Manual rivet nut tools have a simple design and are easy to carry, maintain, and use on-site. They are more suitable for repair work or prototyping involving small quantities.
The drawback is that the installation force must be generated manually by operating the handle. Consequently, prolonged use can lead to hand fatigue, affecting installation efficiency and consistency. Manual tools are not suitable for high-frequency, high-volume production.
Lever Rivet Nut Tools
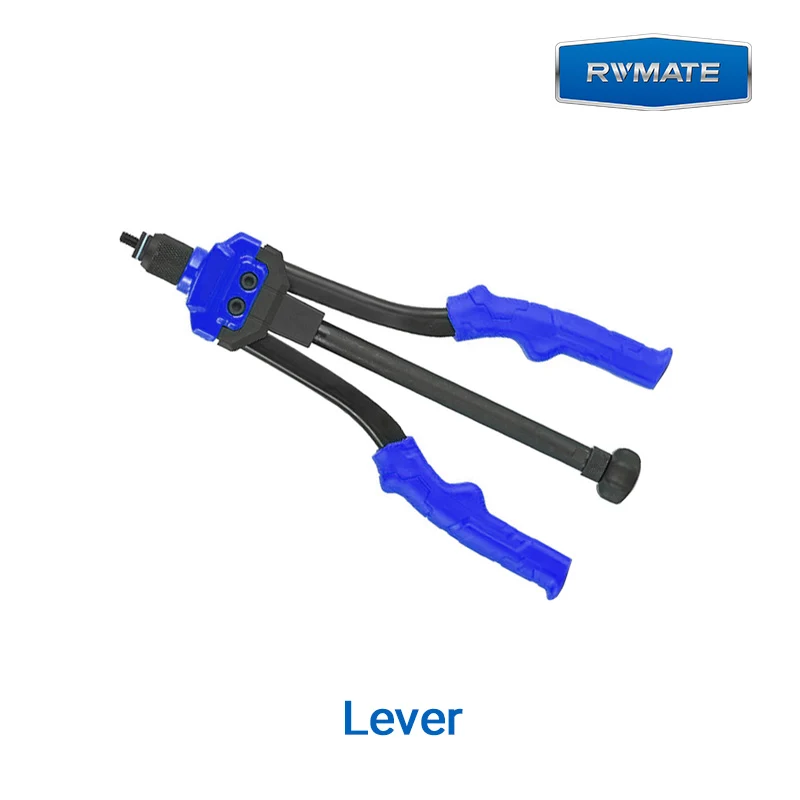
Lever rivet nut tools utilize a longer handle or lever mechanism to amplify your operating force. This allows you to generate greater pulling force from a relatively small amount of hand strength.Compared to the short-handled tools mentioned earlier, they are better suited for assemblies requiring higher installation forces.
Compared to manual rivet nut tools, lever rivet nut tools are better suited for installing larger-sized rivet nuts without the use of powered equipment. The drawback is that lever rivet nut tools have longer handles, requiring more operating space.
Pneumatic Rivet Nut Tools
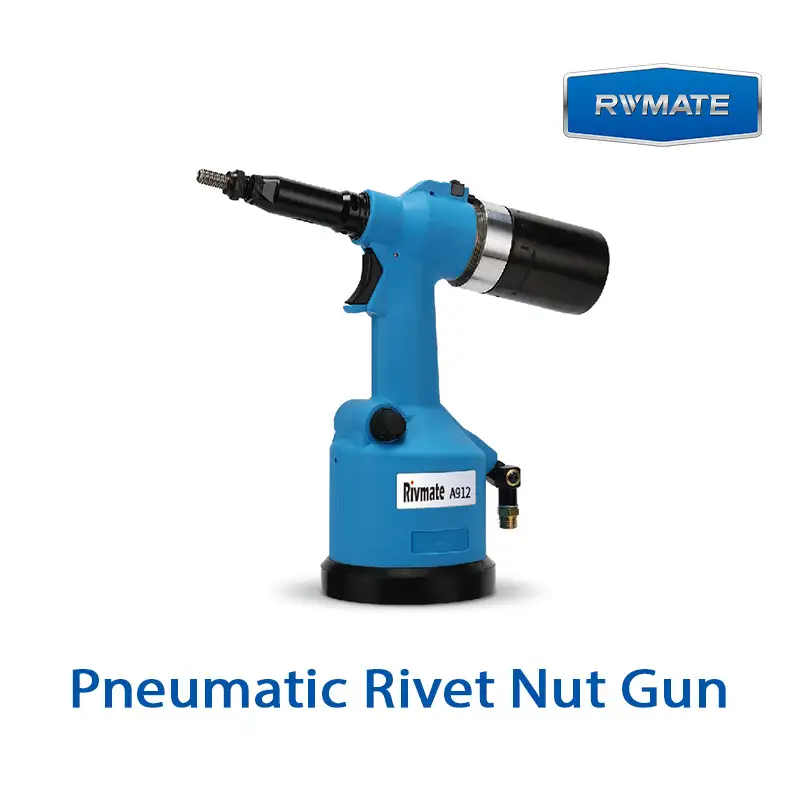
Pneumatic rivet nut tools operate by using compressed air to drive internal mechanisms to perform the riveting operation. Compared to manual tools, they significantly reduce the physical strain on the operator. Their greatest advantage is their ability to support continuous installation and mass production, thereby improving assembly efficiency.
Pneumatic rivet nut tools are widely used on high-volume assembly production lines. A prerequisite for their use is a stable compressed air system. It is essential to ensure that the air supply pressure, air consumption, and air hose connections meet the tool’s requirements.
Hydraulic Rivet Nut Tools
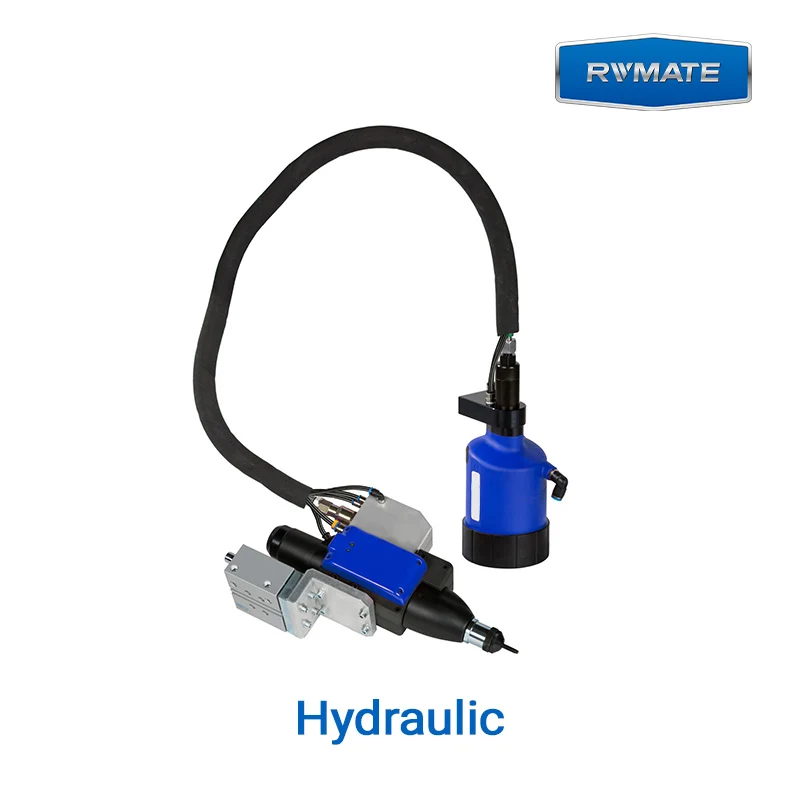
Hydraulic rivet nut tools operate by using pressurized fluid to transmit power, generating the pulling force required for installation. Hydraulic systems can deliver significant force within a compact actuator. They are particularly suitable for industrial assembly connections that involve high installation resistance, require high tensile force, or have specific control requirements for the installation process.
Cordless Rivet Nut Tools
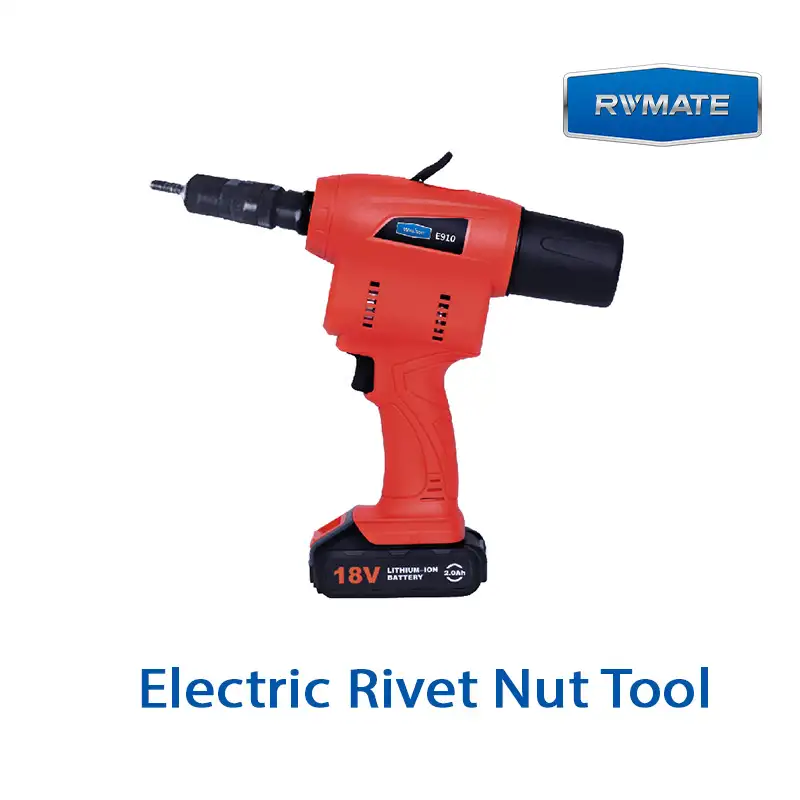
Cordless rivet nut tools are powered by rechargeable batteries; an electric motor drives the mandrel to rotate and activates the riveting mechanism to complete the installation. Different models may feature functions such as automatic nut insertion, riveting, and automatic mandrel retraction. These features effectively reduce repetitive operations and improve installation efficiency.
One of the major advantages of cordless rivet nut tools is that they can move freely between workstations without restrictions. Another is the ability to install rivet nuts at sites where compressed air lines are not available. Cordless tools offer a high degree of flexibility. The drawbacks include the need to consider battery life, charging time, and the cost of spare batteries.
Rivet Nut Tool Parts and Their Functions
A rivet nut tool consists of the following components: mandrel, nosepiece, setting mechanism, stroke or pull force adjustment, handle or trigger, power system, reverse or mandrel release mechanism, and body and housing. These components are responsible for, respectively, securing the nut, providing the pulling force required for installation, supporting the nut, and retracting the tool once installation is complete. Once you clearly understand the function of each component, you’ll be better equipped to select the right tool, determine whether accessories are compatible, and troubleshoot common installation issues.
Main Components of a Rivet Nut Tool
| Component | Main Function |
|---|---|
| Mandrel | Threads into the rivet nut and transmits the pulling force required during installation. |
| Nosepiece | Supports and positions the rivet nut to help maintain proper alignment during installation. |
| Anvil or Support Component | Provides the reaction surface required for setting. Its exact design varies by tool, and the support function may be integrated into the front-end assembly. |
| Setting Mechanism | Generates and transfers the setting force that deforms the rivet nut behind the workpiece. |
| Handle or Trigger | Allows the operator to operate the tool. Manual tools use a handle to apply force, while powered tools typically use a trigger or switch. |
| Power System | Supplies energy through manual force, compressed air, hydraulic power, or a rechargeable battery, depending on the tool design. |
| Stroke or Force Adjustment | On equipped models, allows adjustment of the setting stroke or pulling force according to the tool’s design. |
| Mandrel Release Mechanism | Allows the mandrel to disengage from the installed rivet nut. The release method depends on the tool design. |
| Body and Housing | Supports and protects the internal drive mechanism and other components. |
How Do Rivet Nut Tool Components Work Together?
- The mandrel and front end fitting are used for positioning and riveting. Before installation, the mandrel is screwed into the internal threads of the rivet nut, while the front end fitting provides support as a nut. Once the tool is activated, the riveting mechanism pulls the mandrel relative to the support point, causing the rivet nut to deform or fold on the back of the sheet metal.
- The power system and riveting mechanism determine how the tool’s installation force is generated. Manual tools rely on manual force, pneumatic tools are driven by compressed air, hydraulic tools transmit power through pressurized fluid, and cordless tools are powered by batteries. Some industrial assembly applications also use a pneumatic-hydraulic boost system, which works by using compressed air to drive the mechanism and then generating the installation force through a hydraulic system.
- The mandrel retraction mechanism is responsible for separating the tool from the rivet nut once installation is complete. Proper retraction settings help prevent thread damage and unnecessary mechanical stress.
How Mandrel Size and Thread Standards Must Match
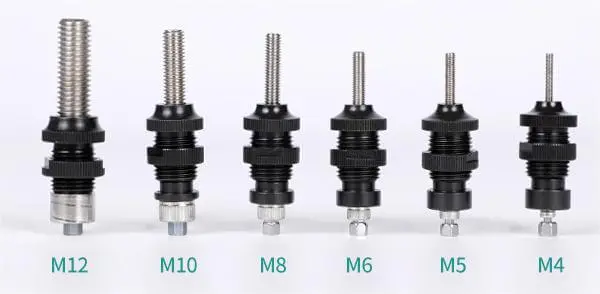
The mandrel is a critical component that connects to the internal threads of the rivet nut. Before installation, you must ensure that the mandrel’s thread size, pitch, and thread standard are compatible with the rivet nut. The tool must also be compatible with the mandrel. If there is a mismatch, the mandrel may not screw in smoothly, or the threads may be damaged during installation, leading to installation failure.
1. Identical thread sizes do not necessarily mean the threads are compatible
The size of the mandrel must match the thread specifications of the rivet nut. Common metric threads include M3–M12. British standard threads use specifications such as Unified Coarse Thread (UNC) or Unified Fine Thread (UNF). There are differences in diameter, pitch, and thread profile between these two thread systems, so selection must be based on specific data.
For example, the pitch of an M6 standard coarse thread is typically 1.0 mm. 1/4-20 indicates 20 threads per inch, with a pitch of approximately 1.27 mm. Although the nominal diameters of these two are similar, the differences in their threads mean they cannot be used interchangeably.
2. The mandrel must match not only the thread but also the tool model
Compatibility between the mandrel and the tool body is also crucial. Different models of rivet nut tools may use different mandrel connection methods, lengths, and mounting structure.Therefore, even if the thread specifications match, it does not necessarily mean the mandrel can be directly installed on another tool.
How to Use a Rivet Nut Tool Correctly
Properly installing a rivet nut is not as simple as just tightening it with a rivet gun. You also need to ensure that the tool specifications match, the mounting hole dimensions are correct, and the sheet metal thickness meets the requirements. After installation, the rivet nut should be secure and the internal threads intact.
8 Steps for Properly Installing Rivet Nuts
- Step 1: Verify the rivet nut specifications: Ensure that the rivet nut’s thread size, material, head type, and clamping range are compatible with the sheet metal.
- Step 2: Mark and drill holes of the correct size: Machine the mounting holes according to the manufacturer’s specification sheet, ensuring that the hole diameter, shape, and position meet requirements.
- Step 3: Deburr, clean, and inspect the hole locations.
- Step 4: Set up the rivet nut tool and mandrel: Select a mandrel and front adapter that match the rivet nut.
- Step 5: Correctly mount the rivet nut onto the mandrel
- Step 6: Insert and rivet the rivet nut
- Step 7: Keep the tool vertical
- Step 8: Remove the tool and inspect the installed rivet nut
How to Adjust Stroke or Pull Force

1. Understanding the Difference Between Stroke and Pull Force
- Setting stroke refers to the distance the mandrel is pulled during the installation process, as determined by the tool’s operating mechanism. You can control the length of the mandrel’s movement during installation by adjusting the stroke.
- Pull force refers to the force applied by the riveting tool during the installation process. You can control the installation process by setting the force. Adjustments should be made based on variations in nut length or workpiece thickness.
2. How do you adjust the riveting stroke?
If your tool supports stroke adjustment, first confirm the specifications, length, and thickness of the workpiece, then select the initial stroke according to the manufacturer’s instructions. Next, perform a test assembly using a test plate made of the same material and thickness as the actual workpiece.
If the rivet nut is not sufficiently deformed, gradually increase the stroke within the adjustment range specified in the manual. If excessive deformation, thread damage, or workpiece deformation occurs, stop the operation and reassess the stroke setting.
3. How to Adjust the Riveting Force?
If your tool supports force adjustment, first check the rivet nut specifications, material, and the adjustment instructions provided by the tool manufacturer to select the initial setting. Then, install the rivet nut on a test plate. Check the clamping condition of the rivet nut after deformation, as well as the integrity of the threads and the tool’s withdrawal.
If the rivet nut is loose, first check the hole diameter, clamping range, and mandrel fit. Once you have confirmed that these conditions are correct, gradually adjust the riveting force according to the manufacturer’s instructions. If the nut is over-deformed, the threads are damaged, or the mandrel is difficult to withdraw, stop the test assembly and reset the riveting force.
Choosing a Tool for Access, Volume, and Material
When selecting a rivet nut tool, you should not only consider whether the installation location is restricted, but also whether the number of rivets to be installed, as well as the material and thickness of the workpiece, are compatible with the selected tool. Using the correct tool helps improve both installation efficiency and quality.
| Selection Factor | Application Scenario | Recommended Tool Selection | Key Checks |
|---|---|---|---|
| Access Space | Open work areas with sufficient operating space | Choose manual, pneumatic, or cordless tools based on installation volume. | Tool dimensions, ease of operation, and mandrel alignment. |
| Access Space | Confined areas, equipment interiors, or locations near tubing | Consider compact tools or models specifically designed for restricted access. | Nosepiece length, tool body dimensions, and operating clearance. |
| Installation Volume | Occasional installation, maintenance, or sample assembly | Manual tools are often economical and require no external power supply. | Operating effort, rivet nut specifications, and usage frequency. |
| Installation Volume | Repeated installation with a need to reduce operator fatigue | Consider lever-operated or cordless tools based on production requirements. | Operator effort, installation efficiency, and tool weight. |
| Installation Volume | High-frequency, continuous production | Evaluate pneumatic, pneumatic-hydraulic, or other suitable powered tools. | Duty capability, power supply, and installation consistency. |
| Workpiece Material | Carbon steel, stainless steel, or aluminum sheets | Select a tool based on the material, sheet thickness, rivet nut specifications, and setting requirements. | Setting capability, grip range, hole size, and tool compatibility. |
| Workpiece Material | Plastic or composite materials | Confirm rivet nut suitability for the material and validate the installation method. | Cracking, crushing, local deformation, and joint reliability. |
| Installation Control | Applications requiring stroke or pulling force control | Choose a compatible tool with the required adjustment capabilities. | Control method, manufacturer recommendations, and trial installation results. |
Tool Maintenance and Common Operating Problems
Regular maintenance of rivet nut tools is also very important. It helps reduce wear and tear on parts, minimize installation interruptions, and lower the risk of unstable fastenings. Whether the tools are manual, pneumatic, hydraulic, or cordless, it is essential to regularly inspect the mandrel, front coupling, and the tool’s overall condition.
How to Properly Maintain a Rivet Nut Tool?
Regular maintenance of rivet nut tools is also very important. It helps reduce wear on components, installation interruptions, and the risk of unstable fastenings. Whether the tool is manual, pneumatic, hydraulic, or cordless, you must regularly inspect the mandrel, front end fitting, and the tool’s overall condition.

- Inspect the mandrel and nosepiece regularly. After prolonged use, the mandrel threads may become worn, deformed, or damaged, making installation difficult. You should regularly check the condition of the mandrel threads and inspect the nosepiece for obvious wear, damage, or deformation that could affect alignment. If any parts are found to be damaged, replace them immediately with parts that match the tool model and rivet nut specifications.
- Clean the tool regularly to keep it clean, and lubricate it according to the instruction manual. Fine debris is generated during the installation of rivet nuts, so metal shavings, dust, and other contaminants must be removed regularly. Be sure to use the lubricants and methods specified by the manufacturer for tool maintenance.
- Regularly inspect the power system and operating condition. When using pneumatic or pneumatic-hydraulic tools, periodically verify that the compressed air supply meets the operating pressure specified for that model. Pay particular attention to checking air hoses and fittings for leaks or looseness. When using cordless tools, manage battery charging, storage, and replacement according to the instruction manual. If abnormal overheating, a significant drop in power, or repeated error messages occur, stop using the tool immediately and investigate the specific cause.
Frequently Asked Questions and Solutions for Rivet Nut Tools
| Common Problem | Possible Causes | Recommended Solution |
|---|---|---|
| Mandrel Does Not Thread into the Rivet Nut | Incorrect thread specification, damaged threads, or a worn mandrel. | Verify thread compatibility, inspect the threads, and replace damaged components when necessary. |
| Rivet Nut Spins or Becomes Loose | Oversized installation hole, incorrect grip range, insufficient setting, or unsuitable rivet nut selection. | Check the hole diameter, workpiece thickness, and rivet nut specifications. Verify the tool settings before reinstalling with a new rivet nut. |
| Rivet Nut Is Installed at an Angle | Tool misalignment, burrs around the hole, or an incorrectly sized or shaped hole. | Remove burrs, verify the hole dimensions, and keep the tool properly aligned with the workpiece during installation. |
| Mandrel Will Not Release | Damaged threads, excessive setting, incorrect release procedure, or a faulty release mechanism. | Stop forcing the tool. Follow the manufacturer’s release procedure and inspect the mandrel, rivet nut threads, and release mechanism. |
| Tool Fails to Complete the Setting Cycle | Insufficient power supply, incorrect settings, incompatible accessories, or an internal mechanical fault. | Check the air supply, battery, or hydraulic system as applicable. Verify accessory compatibility and arrange professional servicing if the problem persists. |
| Inconsistent Installation Results | Worn mandrel or nosepiece, unstable power supply, changing tool settings, or inconsistent workpiece conditions. | Inspect wear components and the power supply. Verify tool settings and ensure consistent hole sizes, workpiece thicknesses, and rivet nut specifications. |
| Workpiece Deformation or Rivet Nut Damage | Incorrect setting force or stroke, unsuitable workpiece thickness, incorrect hole size, or an incompatible rivet nut design. | Stop installation and reassess material compatibility, hole dimensions, and tool settings. Follow the manufacturer’s recommendations before resuming work. |
| Reduced Tool Power or Abnormal Operation | Low air pressure, leaking hoses, battery issues, hydraulic leaks, or worn components. | Inspect the relevant power supply and connections. Follow the manufacturer’s service procedures for internal repairs or hydraulic system issues. |
FAQs
Is a rivet nut tool the same as a pop rivet gun?
Rivet nut tools are not the same as blind rivet guns; they are two distinct types of fastening tools. They differ in their installation principles, the fasteners they use, and the way they deform.
Can one rivet nut tool install metric and SAE inserts?
When your rivet nut tool supports both metric and imperial thread sizes and allows you to swap out the corresponding mandrels and front adapters, a single rivet nut tool can be compatible with a wide range of thread sizes.
Can a drill adapter replace a hand rivet nut tool?
A drill adapter can replace a manual blind rivet nut tool, provided it is specifically designed for blind rivet nuts. Additionally, this adapter must be compatible with the electric drill, as well as the specifications and installation requirements of the blind rivet nuts. However, there are limitations: it cannot replace all applications that require a manual blind rivet nut tool.
What is the strongest type of rivet nut tool?
Hydraulic and gas-hydraulic pressure-boosting rivet nut tools are better suited for industrial connections that require higher installation forces. It is impossible to say with certainty which type of tool is absolutely the strongest for a given application. The installation force specifications of different tool models vary depending on their design and intended application.
Why does the mandrel get stuck in the rivet nut?
Common causes of the mandrel getting stuck in the nut when using a rivet nut tool include: damage to the internal threads, an incompatible mandrel size, incorrect installation stroke or pull force settings, and improper tool operation.
How often should a rivet nut mandrel be replaced?
There is no fixed standard for how often the mandrel of a rivet nut should be replaced. You can refer to the number of installations specified by the manufacturer as a guideline for maintenance. However, the specific service life of the mandrel depends on the number of installations, the specifications and material of the rivet nut, the degree of thread friction, and the conditions under which the tool is used and maintained. You should periodically inspect the mandrel for wear. Replace it promptly if the threads on the mandrel show signs of wear, or if the mandrel is bent or damaged.
Can a rivet nut tool install plus nuts or jack nuts?
Some rivet nut tools can be used to install PLUSNUTs and Jack Nuts, provided that the tool supports the installation of PLUSNUTs and Jack Nuts and allows for the replacement of compatible mandrels and installation accessories.
How do I know when the rivet nut is fully set?
Determine whether the riveted nut has been properly secured. First, check to see if the nut head is fully flush with the workpiece surface. Next, inspect the back of the sheet metal to ensure there is sufficient deformation around the riveted nut. Finally, verify that the internal threads are intact and that the nut is securely fastened.
Work with a IATF 16949 Certified Blind Rivet Manufacturer
Get High Quality Rivets Instead of Huck and Avdel Rivets

Rivmate Rivet
Rivmate is blind rivets manufacturers in china. The company is IATF 16949 certified and offers high-strength structural blind rivets that serve as alternatives to Huck and Avdel products.
Explore Rivmate Cases
Rivmate Rivet
Rivmate is blind rivets manufacturers in china. The company is IATF 16949 certified and offers high-strength structural blind rivets that serve as alternatives to Huck and Avdel products.

Hey There, I'm Allen!
I am the boss of Rivmate. For over two decades, we have specialized in the manufacture of blind rivets, providing our customers with reliable riveting solutions. Need riveting services? Feel free to contact us.